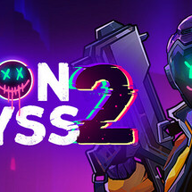
Is Neon Abyss 2 the same game as the original Neon Abyss?
No. This guide is for Neon Abyss 2, Steam app 2235200, and its version 1.0 systems. Original-game item lists and cheat-related search results should not be treated as sequel data.

Neon Abyss 2 beginner guide for surviving early floors, spending keys and bombs, hatching eggs, choosing Faith, and reaching bosses. Verified October 2026.
~11 min read
This Neon Abyss 2 beginner guide is a first-run plan for version 1.0: read your Agent and weapon, clear rooms without trading health for speed, preserve route resources, and commit only after your drops reveal a useful direction. It covers the standard randomized-floor loop rather than the faster Storm Breach mode. Verified October 10, 2026.
The central beginner lesson is simple: a run is not won by grabbing the first flashy reward. It is won by keeping enough health and resources to see more choices, then stacking items, weapon affixes, Hatchmon, and Faith around effects you can trigger reliably. Start with the preparation question below before entering the Abyss.
| Fact | Detail |
|---|---|
| Release state | Version 1.0 released October 8, 2026 |
| Standard mode | Randomized rooms, rewards, shops, special rooms, and bosses |
| Players | 1–4 online co-op |
| Platforms | PC · PlayStation 5 · Xbox Series X|S · Nintendo Switch |
| Core build pieces | Agent, weapon and affixes, stacked items, Hatchmon, and Faith choices |
| Route resources | Keys, bombs, coins, health, shields, and eggs |
| Beginner objective | Create one reliable damage loop while preserving survival and room access |
Begin on a forgiving difficulty while you learn room tells and movement. Higher settings can change enemy durability and other run conditions, but difficulty is not a substitute for fundamentals. The Neon Abyss 2 beginner guide priority is to learn what your starting kit does before judging whether a later pickup is actually an upgrade.
Weapons can behave very differently, from conventional shooting and melee attacks to plants or summoned creatures. Do not force a planned archetype when the run has not offered its required pieces. Your first benchmark is practical: can you hit moving enemies while retaining enough attention to dodge?
An effect tied to weapon level, coins, eggs, bombs, or repeated attacks is not free power. It asks you to maintain a condition. Note which conditions already happen naturally in your run; those are safer foundations than effects that demand resources you rarely hold.
Once the controls and trigger language make sense, the next task is routing a floor without wasting the choices hidden behind its doors.
Clear ordinary combat rooms carefully, then use the map and visible branches to decide where scarce access resources matter most. Random generation means there is no fixed room order, so a Neon Abyss 2 walkthrough must teach a routing rule rather than pretend every floor has the same layout.

| Room signal | Beginner response | Why |
|---|---|---|
| Normal combat | Clear safely and collect visible drops | Basic progress should not cost avoidable health |
| Locked route or chest | Remember it, then check other branches before spending | A later free key or stronger reward may change the decision |
| Bombable obstacle | Compare the visible or likely reward with your remaining bombs | Bombs preserve access and may support item triggers |
| Shop | Inspect first; buy only after comparing the whole stock | Coins can also matter to effects and later purchases |
| Challenge or health-cost reward | Enter only when your build and health can absorb failure | Optional value is not worth ending a promising run |
| Boss door | Finish useful exploration and preparation first | The boss is a commitment, not a scouting room |
Unexplored safe branches represent information: another item, a shop, a key, or a resource drop can alter the best use of what you already hold. Unless a room is too dangerous for the current build, reveal low-cost choices before paying for high-cost ones.
A spike chest or health-priced event may be attractive, but remaining alive long enough to stack more items has value of its own. New players should keep a survival buffer until they know enemy patterns; shields are protection, not permission to ignore bullets.
Routing exposes options, but keys, bombs, and coins decide which options you can take, so the next section turns those resources into a spend rule.
In Neon Abyss 2, spend when the expected benefit improves the current run, not merely because an interaction is available. Preserve at least one route-opening option when practical, especially before the floor has been explored. Exact drops vary, so use the decision table rather than memorizing a rigid number.
| Situation | Spend now when… | Hold when… |
|---|---|---|
| Locked reward | The reward is known or the build badly needs power | Other branches may provide access for free |
| Bombable route | It opens meaningful progress or a visible useful reward | It is only a low-value breakable and bombs are scarce |
| Shop item | It directly strengthens your reliable trigger or survival | It is speculative, redundant, or empties your coin reserve |
| Health payment | You know the room and retain a safe buffer | You are learning the encounter or nearing a boss |
| Egg-related exchange | The immediate effect advances the chosen Hatchmon or build plan | The egg has more value as a future companion or synergy |
A purchase is affordable only if the remaining run still works afterward. Spending the last key may be correct for a build-defining item; spending it on a marginal reward because the door is nearby is usually not. The same principle applies to coins when a current effect scales with the amount held.
After earning a key or bomb, scan previously blocked branches. A resource found late can unlock value you deliberately postponed. That small backtrack is often better than carrying unused access into a boss fight.
Resources buy opportunities; the next decision is whether the rewards inside those opportunities actually belong in one coherent build.
Matched by build plan, shared topics, and guide progression — not random related links.
Unlimited item stacking does not mean every choice has equal value. The strongest Neon Abyss 2 beginner guide builds are readable: the weapon produces damage in a way you can control, several items reward that behavior, and defensive pieces let you keep performing it under pressure. Use the weapons guide when comparing affixes and replacement decisions.
“Hits often,” “spends bombs,” “holds coins,” and “uses companions” are useful build descriptions because they predict whether a pickup will trigger. “Legendary” describes rarity, not whether the effect supports what you are doing. Weapon affixes also vary, so compare the complete weapon rather than its name alone.
Early floors are the cheapest time to change direction because little investment has accumulated. Later, a replacement should clear a higher bar: it must beat the leveled weapon, preserve important triggers, or open a clearly stronger interaction. Constantly switching leaves every idea half-built.
A coherent damage loop still has two special resource systems to evaluate: eggs can become Hatchmon, while Faith can redirect a run through powerful but situational choices.

In Neon Abyss 2, Hatchmon begin as eggs and become companions that can participate in combat and evolve. Treat both the egg and the resulting companion as build pieces, not automatic pickups. Read the Hatchmon guide for companion-specific planning and the Faith guide for Temple, boon, and risk choices.
| Decision | Good beginner reason | Warning sign |
|---|---|---|
| Hatch or recruit | The companion adds reliable damage, coverage, or support | You are spending only because an egg exists |
| Hold an egg | Current effects scale with eggs or a later choice may use one better | Holding delays needed power with no active benefit |
| Spend Faith | The offer clearly supports the current weapon, survival, or companions | The result is vague, random, or pulls the build in a new direction |
| Take a chance | The run can survive a weak outcome | Failure removes the resource needed for the next floor |
A useful Hatchmon should solve something: add pressure while you dodge, reach awkward enemies, strengthen a companion-focused interaction, or contribute dependable damage. More followers are visually exciting, but the decision remains the same as any item—what does this one do for the current loop?
Official material describes Faith as usable for strong shop effects, recruiting Hatchmon, or risking it in chance-based outcomes. Do not spend merely to empty the meter. Compare the offer with what the run lacks, and keep uncertainty labeled when the exact 1.0 interaction has not been verified in play.
After those choices, stop shopping in your head and make a concrete boss plan before crossing the door.
The Neon Abyss 2 beginner guide boss rule is to enter with a repeatable attack, enough health to learn, and a movement plan. Boss damage is less important than maintaining safe uptime: attack during readable windows, move through open space, and avoid chasing one final hit into a pattern you have not learned.
A lost run still teaches attack timing, dangerous platform positions, and whether the build lacked damage or survivability. Record the cause precisely. “Too weak” is not actionable; “stood too close during a spread pattern” or “changed weapons before the boss and lost reliable range” is.
If the attack loop worked whenever you had space, improve dodging and positioning. If the weapon could not reach safely or the effects rarely triggered, improve build decisions. The boss guide continues with Titans, Theia, and route preparation.
Most early deaths can be traced to a small set of decisions, so finish with the mistakes checklist before starting another run.
Use this Neon Abyss 2 mid-run diagnosis table when a run feels weaker than its item count suggests. Each symptom points to one correction you can apply immediately or on the next floor.
| Symptom | Likely mistake | Correction |
|---|---|---|
| Many items, low practical damage | Triggers do not match the weapon behavior | Prioritize effects activated by the attack you actually repeat |
| Blocked from a valuable room | Keys or bombs were spent on marginal rewards | Explore first and preserve one access option when practical |
| Boss feels impossible to approach | Weapon was chosen for rarity, not usable range | Test every replacement before investing |
| Health disappears in normal rooms | Damage is being traded for clear speed | Slow down and keep movement space |
| Eggs or Faith feel wasted | They were spent without a defined job | Name the expected companion or build benefit first |
| Build changes every room | Every new drop is treated as a command to pivot | Keep the established loop unless the replacement is clearly stronger |
| Co-op starts badly | Party and platform assumptions were not checked | Confirm platform status, then assign simple room and shop calls |
Ask: what is dealing most of my damage, what resource preserves my next choice, and what can kill me in the next room? Those answers tell you what to keep, what to hold, and how aggressively to move. They are more useful than copying a late-game build assembled from different drops.
With that reset in hand, the final FAQ resolves the version, multiplayer, and progression questions that commonly interrupt a first session.
No. This guide is for Neon Abyss 2, Steam app 2235200, and its version 1.0 systems. Original-game item lists and cheat-related search results should not be treated as sequel data.
Yes. The game supports one to four players online. Read the co-op guide for party planning and platform status before assuming a mixed-platform lobby.
No. Compare attack behavior, weapon level, affixes, and current item triggers. A familiar leveled weapon that powers the build can be better than a rare replacement with poor fit.
No. Hatch when the companion adds more to the current run than holding or using the egg elsewhere. Egg-related item effects can change that calculation.
There is no guaranteed fixed build in randomized runs. Choose a controllable weapon, stack effects you trigger often, preserve survival, and add Hatchmon or Faith choices that reinforce that loop.
Check platforms and crossplay before organizing a party, then use weapons, Hatchmon, and Faith for deeper build decisions.
Matched by build plan, shared topics, and guide progression — not random related links.