What does Faith do in Neon Abyss 2?
Faith shapes run decisions through meters, directions, Temples, Faith Rooms, boons, shops, Hatchmon recruitment, weapon paths, and risk opportunities.

Neon Abyss 2 Faith system guide for Temple spending, Faith Rooms, boons, Hatchmon choices, Artisanism changes, and smarter risk bets. Verified October 2026.
~11 min read
This Neon Abyss 2 Faith guide turns Faith into a planned resource decision: identify the current Faith direction, check what changes the meter, inspect the Temple or Faith Room offer, spend only for an immediate build job, and preserve a buffer when the next outcome is uncertain. Faith can influence shops, rewards, Hatchmon recruitment, weapon directions, and chance-based opportunities. Exact meter values, room odds, costs, boon pools, and object formulas remain Unverified unless the version 1.0 interface states them. Verified October 10, 2026.
The practical choice is not “which Faith is best?” It is “which offered outcome fixes this run, and what do I give up to get it?” Artisanism points toward forged weapons and badge-driven affixes after its 1.0 rework. Agapeism is a separate named direction whose current triggers and rewards must be read live. A strong Faith plan compounds an action already happening; a weak one spends the meter merely because a Temple, machine, or gamble is available.
| Fact | What it means for a run |
|---|---|
| Faith Temple | A Temple is a decision point tied to the current Faith meter and direction |
| Faith Room | Faith-related rooms can present rewards, changes, or spending decisions |
| Faith Boon | A boon should be judged by trigger, payoff, and current build fit |
| Spending paths | Faith can relate to shops, Hatchmon recruitment, and chance-based opportunities |
| Artisanism 1.0 | The rework uses badges to shape new affix directions on forged weapons |
| Named elements | Candle Jar, Purity Sigil, Agapeism, and Faith Machine belong to the documented system vocabulary |
| Verification boundary | Exact costs, odds, pools, meter rules, and item effects require current UI evidence |
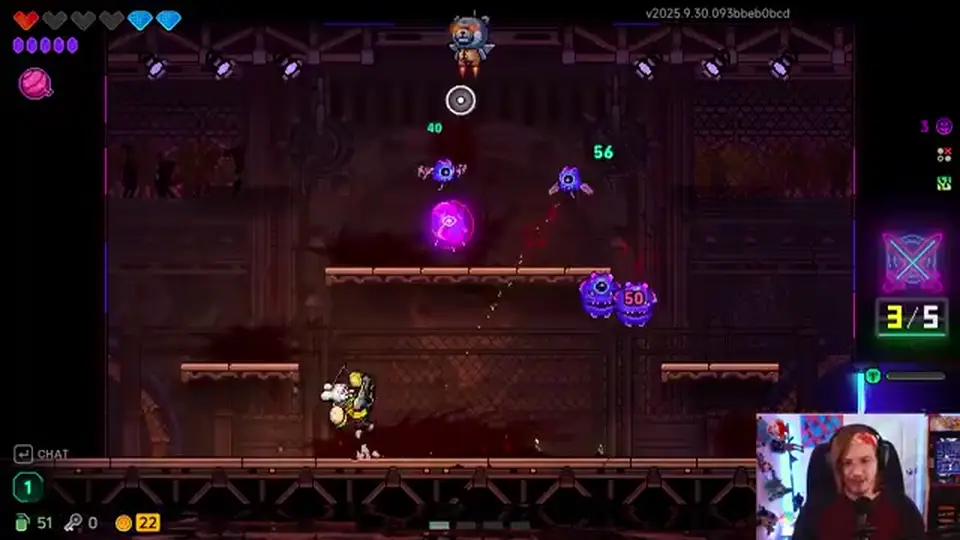
Faith is both a direction and a resource flow. Actions and effects can change the meter; Faith Temples and Faith Rooms convert that state into offers or consequences. The available direction can then reinforce weapons, items, Hatchmon, rewards, or another part of the run. Public gameplay demonstrates a Faith meter changing and a Temple consuming or preserving it under specific effects, but one recording cannot establish universal gain and loss rules.
| Step | Question | Safe action |
|---|---|---|
| Generate | What current action changes Faith? | Quote the live effect and repeat it in an ordinary room |
| Commit | Which Faith direction is active? | Read its name and current description before building around it |
| Enter | What does this Temple or Faith Room offer? | Inspect cost, reward, and any meter reset wording |
| Spend | Which current weakness does the outcome fix? | Choose survival, engine, multiplier, or coverage intentionally |
| Retest | Did the run actually improve? | Observe clear safety, weapon uptime, Hatchmon value, and remaining resources |
Filling a meter has value only when the resulting offer supports the run. If the build must take unsafe actions or sacrifice scarce resources to push Faith in the wrong direction, the apparent progress can lower expected survival.
A useful single boon does not prove every reward in that Faith direction will fit. Re-evaluate each offer. Keep the working trigger, but do not turn a prior good purchase into a rule that every later Temple spend is mandatory.
Pause before entering a Faith Temple and record four things: current meter state, active Faith direction, HP or shield buffer, and the build’s weakest job. Then identify whether a live effect says Faith will be spent, retained, converted, or changed after leaving. Gameplay footage shows that meter retention can be altered by an effect, which is exactly why a remembered default should not replace current wording.

Set a minimum survival and route buffer before seeing the offer. This prevents a dramatic reward from redefining what you can safely afford. If the Temple requires a cost that breaks the buffer, leaving without the optional spend can be correct.
The available footage shows a special effect preserving Faith after Temple use and enabling repeated room access. That supports the existence of conditional retention, not a promise that Faith normally persists forever. Check the current effect every run.
Choose among three broad outcomes by expected job. A shop spend is strongest when the offer is known and immediately repairs the build. Hatchmon recruitment is strongest when the companion fills missing coverage or completes a verified egg engine. A chance-based bet is acceptable only after core survival and route options are protected. Do not compare them by spectacle; compare certainty, timing, and the value of the resource left afterward.
| Faith use | Prefer it when… | Pass when… |
|---|---|---|
| Shop purchase | The exact offer fixes survival or completes a reliable trigger chain | It duplicates solved value or consumes the last buffer |
| Recruit Hatchmon | The companion’s shown role covers a missing lane or supports an egg loop | The identity or ability is unclear and the run needs certainty |
| Risk opportunity | Failure is survivable and the upside changes the run meaningfully | The chance, cost, or loss condition is unreadable |
| Weapon direction | The live Faith effect supports the weapon already kept | It requires abandoning a working engine for speculative affixes |
| Hold Faith | No current offer beats future flexibility | A verified cap or reset would waste the resource—confirm this live |
“More Hatchmon” is not enough. Recruit when the companion attacks a lane your weapon misses, provides control or survival, or activates wording already present in the build. Otherwise preserve Faith for a clearer offer.
A Faith Machine or other chance mechanism should be evaluated from the failed state first. If failure removes the next safe purchase or leaves the run unable to survive one mistake, the bet is too expensive even when its headline reward is attractive.
Compare a Faith Boon as trigger → payoff → frequency → conflict → opportunity cost. Trigger is the action required. Payoff is the result. Frequency estimates how often the current build performs the action. Conflict checks whether the boon demands a range, weapon, Hatchmon, or resource pattern that fights the build. Opportunity cost is the alternative Faith spend and future Temple flexibility lost.
| Boon test | Passing answer | Failure signal |
|---|---|---|
| Trigger | The normal run loop already performs it safely | You must force an unrelated or dangerous action |
| Payoff | It fixes a named weakness or multiplies a working engine | It adds visual noise without a needed result |
| Frequency | The effect occurs often enough to plan around | The condition rarely appears in ordinary rooms |
| Conflict | Weapon, Agent, Hatchmon, and items can support it together | It pulls the build into incompatible ranges or resources |
| Cost | A survival and route buffer remains afterward | The boon empties Faith before an uncertain floor |
| Proof | A repeatable room test shows the change | The claimed interaction depends on assumed hidden math |
A boon that strengthens a proven weapon or Hatchmon trigger is usually easier to convert into value than one that opens a second speculative engine. Build breadth only when the first chain is stable and a known threat requires coverage.
Names can persist while effects change. Capture the version 1.0 description, including conditions and tradeoffs, before carrying an old boon ranking forward. If a number or cap is absent, describe observed behavior without inventing it.
Matched by build plan, shared topics, and guide progression — not random related links.
Artisanism Faith was reworked for version 1.0. Its documented direction now uses badges to give forged weapons new affix directions. That makes Artisanism a weapon-planning choice rather than a generic “more damage” label. The full badge list, exact affixes, forge costs, roll weights, and stacking rules are not verified on this page and must be read from the current forge and Faith interfaces.
| Artisanism check | Decision |
|---|---|
| Weapon already has a reliable attack pattern | Favor badges or affix directions that reinforce that pattern |
| Current weapon is temporary | Delay deep Faith investment until a keeper appears |
| Build lacks survival | Do not choose an offensive affix direction over immediate stability automatically |
| Badge wording matches an active trigger | Test one forged result before buying further multipliers |
| Exact affix is not shown | Mark it Unverified instead of promising a roll |
Forging value is wasted when the base weapon cannot handle current rooms or does not match the Agent’s safe range. First pass the keep-or-sell test: reliable pattern, useful fixed behavior, and room plus boss coverage. Then let Artisanism shape its next affix direction.
The rework supports planning around new affix directions, but “direction” does not prove one exact result or probability. Read the badge and forge preview, preserve screenshots of the before and after weapon, and report only what the interface confirms.
Agapeism Faith is a named alternative within the Faith system, but its complete current triggers, boon pool, costs, and meter behavior are not verified here. Choose it only from the live description: translate that wording into the repeated action it rewards, then compare that action with the current weapon, Agent, Hatchmon, and survival state.
| Live Agapeism wording says… | Then test… |
|---|---|
| It rewards a frequent safe action | Whether ordinary rooms produce the payoff consistently |
| It changes recovery or durability | Whether it increases mistakes survived and boss uptime |
| It interacts with Hatchmon or eggs | Whether obtaining, hatching, recruiting, or companion count is the exact trigger |
| It changes room or reward access | Whether the route gain beats the Faith and survival cost |
| The condition is unclear | One controlled activation before making further purchases |
Artisanism and Agapeism are navigation labels, not self-explanatory mechanics. The better direction is the one whose current effect compounds what the run already does safely or solves what currently ends it.
Changing Faith direction can invalidate earlier purchases or meter plans. Pivot when the new live offer creates a clearer trigger chain and the old direction no longer supports the kept weapon or companions—not because a new room looks rarer.
Candle Jar, Purity Sigil, and Faith Machine are documented Faith-system elements, but their exact version 1.0 formulas and availability are not established by the available video. Use the names to recognize a Faith decision, then read the full current interaction before paying, activating, or routing around it.
| Element | Safe interpretation | Do not claim without live proof |
|---|---|---|
| Candle Jar | A named element associated with Faith interactions | A fixed gain, price, spawn rule, or meter formula |
| Purity Sigil | A named Faith-system element whose wording should be inspected | Permanent protection or a universal cleanse behavior |
| Faith Machine | A named mechanism that may present a resource or chance decision | Win rate, payout table, loss streak rule, or guaranteed return |
| Faith Room | A room category tied to Faith choices and rewards | One permanent layout, pool, or entrance condition |
| Faith Temple | A key point for converting current Faith state into an outcome | That the meter always resets or always persists |
A correct label is not a complete mechanic. Capture the object, interaction prompt, cost, result, active Faith, and meter before and after. This prevents a nearby room effect from being incorrectly attributed to the named object.
Before using a chance mechanism, define the maximum Faith or other resource you can lose while keeping the run viable. Stop when that budget is reached. A previous loss does not make the next attempt more valuable unless the current interface explicitly proves a pity or escalating-return rule.
Run one-variable tests. Record active Faith, meter state, room, relevant object, Agent, weapon, Hatchmon, items, badges, cost, and the before-and-after result. Change only one action where possible. Repeat the observation before publishing a general rule, especially for chance mechanics, room access, meter retention, and badge outcomes.
A failed activation can reveal a missing condition. Record it with the same detail as a success. Several controlled failures are more useful than turning one lucky result into a universal Faith Machine strategy.
The 1.0 Artisanism rework makes older badge and affix advice especially risky. Preserve the date and version with every finding, and leave exact values Unverified when no current interface or repeatable test supports them.
Faith shapes run decisions through meters, directions, Temples, Faith Rooms, boons, shops, Hatchmon recruitment, weapon paths, and risk opportunities.
No. Spend when the shown outcome fixes a current weakness or compounds a proven engine while leaving enough survival and route flexibility.
Artisanism is a weapon-oriented Faith direction reworked in version 1.0. Badges now guide new affix directions for forged weapons; exact pools and values require live verification.
Not universally. Read the current effects: Artisanism should fit a weapon and forge plan, while Agapeism should be chosen only when its live trigger and payoff better fit the run.
Then read Titan tells before greeding damage, compare the kept weapons, or check whether a Hatchmon gives safer coverage.
Matched by build plan, shared topics, and guide progression — not random related links.